Table of Contents
This is an old revision of the document!
Technical Notes - Library in a Box
Installation
Recommended installation of the eLibrary in a Box is just via microSD image copy (see microSD Card section below) as well as by inserting the microSD into the Raspberry Pi 3 Model B and powering it up. The microSD (at least 64GB) should be of high quality.
Setup
When deployed by partner organizations, the eLibrary in a Box is ready for use. However, should there be any need for further setup, access is either via ssh or desktop access (with HDMI monitor, USB mouse and keyboard).
Secure login credentials from your tech provider. Change default password ASAP.
- include in /etc/hosts the following line:
172.24.1.1 library.ph
microSD Card
 Using a reliable microSD reader, you may copy, backup or reproduce the contents (via image) of eLibrary Box. The source image itself may be shared via peer-to-peer connection or download. Contact [email protected] if interested in building your own Library in a Box using this method.
So, to have your own eLib in a Box,
- (a) buy a Raspberry Pi 3 Beta Starter Kit and a microSD 64GB card
- (b) get a back-up image of a working system (Step 1 below)
- (c ) restore the image to a new microSD card (Step 2 below)
- (d) Insert the card to the the Raspberry Pi 3.
Backup
- locate the device (/dev) identifier. On macOS terminal
diskutil list
- copy (example disk5)
sudo dd if=/dev/disk5 of=~/Desktop/tambayayong-eLib-box.dmg
Restore
To restore or replicate the image to another microSD,
sudo dd if=~/Desktop/tambayayong-eLib-box.dmg of=/dev/disk5
On Mac, try this variation for speed:
sudo dd bs=1m status=progress if=~/Desktop/tambayayong-eLib-box.dmg of=/dev/rdisk5
Tips: verify the /dev identifier by using diskutil list. Restoration takes longer than backup. For the Tambayayong eLib Box using microSD Class 10, about 5 hours on mac mini. When initially getting a “resource busy” error message, try unmounting first the subpartition (example):
diskutil umount /dev/disk5s2
Do the same for the other “s” numbers, as determined by the diskutil list command. In certain cases, you have to do the force option.
diskutil umount force /dev/disk5s2
Once done with restore, be a good girl/boy. Unmount to finish.
diskutil unmountDisk /dev/disk5
For most part, restoring an image is a straightforward process. But sometimes you'll encounter bad cards that you may have to reformat them first to some useless format, just to test whether the card is writable in the first first. So, before doing the routine above, try something like this first:
sudo diskutil eraseDisk FAT32 RASPBIAN MBRFormat /dev/disk5
Confirm unmounting with diskutil list. You may also have to check whether there's a process preventing you from unmounting.
sudo lsof|grep disk5
In which case, you do
sudo kill -9 <insert process ID number>
Another possibility that's preventing you from copying an image to a new microSD card is a broken partition table. In which case, just create a new one
sudo gpt create -f /dev/disk5
Maintenance
Maintenance of the Library in a Box by parts (all available at online stores like Lazada and Shopee):
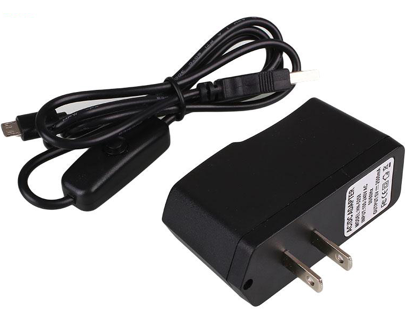
![_]() power supply. This can be replaced by any Android cellphone charger with output of 2.5A. If eLib Box usage is not high, 2A will do, and it can even run on a power bank for mobile phones. But 2.5A is the recommended rating. Make sure, however, that you're not using Raspberry Pi 3 Beta Plus - a slightly more powerful version but requiring a more expensive 3A-output power and at least the latest Raspbian Stretch OS. See Raspbian versioning and OS requirement.
power supply. This can be replaced by any Android cellphone charger with output of 2.5A. If eLib Box usage is not high, 2A will do, and it can even run on a power bank for mobile phones. But 2.5A is the recommended rating. Make sure, however, that you're not using Raspberry Pi 3 Beta Plus - a slightly more powerful version but requiring a more expensive 3A-output power and at least the latest Raspbian Stretch OS. See Raspbian versioning and OS requirement.
![_]() microSD card. This card contains both the operating system and the contents of the Library in a Box. An image backup is recommended so local restoration is possible. Otherwise, request your technology service provider for replacement. Future updates and enhancements may also be available through your technology service provider.
microSD card. This card contains both the operating system and the contents of the Library in a Box. An image backup is recommended so local restoration is possible. Otherwise, request your technology service provider for replacement. Future updates and enhancements may also be available through your technology service provider.
In certain situations, it makes sense to pre-position updated microSD cards in the locality to be able to quickly respond to a possible breakdown in one of the eLib sites.
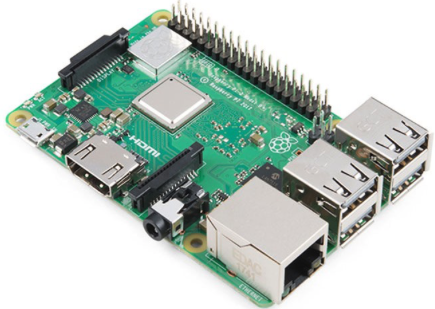
![_]() Raspberry Pi 3 Beta microcomputer is available via online stores. (Not to be confused with Raspberry Pi 3 Beta Plus - a slightly more powerful version but requiring 3A power and at least the latest Raspbian Stretch OS.) The micro SD that came with the original setup can just be inserted into a newly-ordered Raspberry Pi 3 Model B, and it should be good to go.
Raspberry Pi 3 Beta microcomputer is available via online stores. (Not to be confused with Raspberry Pi 3 Beta Plus - a slightly more powerful version but requiring 3A power and at least the latest Raspbian Stretch OS.) The micro SD that came with the original setup can just be inserted into a newly-ordered Raspberry Pi 3 Model B, and it should be good to go.![_]() Over time, the heatsink could detach, as its adhesive would dry up. In this case, just remove the heatsink from the box to prevent it from short-circuiting the microcomputer board. The alternative is to use some double-sided, heat-transfering adhesive tape to re-attach the heatsinks. Remember to wipe the surface first before mounting the heatsink.
Over time, the heatsink could detach, as its adhesive would dry up. In this case, just remove the heatsink from the box to prevent it from short-circuiting the microcomputer board. The alternative is to use some double-sided, heat-transfering adhesive tape to re-attach the heatsinks. Remember to wipe the surface first before mounting the heatsink.
Upgrade
As it it, the Tambayayong eLib Box is released as a stand-alone deployment. No need for any upgrade with the OS. (The contents could be changed to suit the needs of partner schools.)
However, in certain cases (say, changing board to Raspberry Pi 3 Beta Plus) where a later system is needed, one may upgrade the OS. As of this writing, Raspbian “Jessie” (version 8) is used as default version of the operating system. Check if there's enough space on your microSD card. Also confirm version with
less /etc/os-release
To upgrade to the later version (“Stretch” as of this writing), connect the box to the internet via RJ-45 jack, and do
sudo apt-get update
sudo apt-get -y dist-upgrade
To ensure you have everything of the upgrade version, do
sudo apt-get update
sudo apt-get upgrade
Packages have to be upgraded as well, and they may have to be “forced”
sudo rpi-update
Edit
/etc/apt/sources.list
/etc/apt/sources.list.d/raspi.list
to ensure “stretch” is indicated. For instance,
deb http://archive.raspberrypi.org/debian stretch main ui
You may have to remove the changelog
sudo apt-get remove apt-listchanges
for faster upgrade.
Repeat the update/upgrade routine. Once done, clean up:
sudo apt-get autoremove -y
sudo apt-get autoclean
Then reboot.